Salted Caramel Apple Pie

I'll be honest. Apple pie has always soothed my soul. Until I had caramel apple pie. Now I find myself pining for caramel apple pie every year without fail, searching grocery stores and snatching up a piece at any bakery that has the decency to include this delicacy in their supply. So of course, I had to try my hand at making my own. My only obstacle was attempting the perfect homemade caramel sauce. I've never made caramel from scratch because I assumed it would be time-consuming, tricky and probably messy, but then I looked through some recipes and was annoyed at how simple it really was! So here she is, salted caramel apple pie.

First, make a fresh pie crust. You can use your own favorite recipe, a pre-made crust, or a single crust recipe I've previously posted.

Prepare the crust into a cast iron skillet or pie dish and set aside.

Now you'll need to make the salted caramel. Don't be intimidated if you have never made it before. The key to this simple sauce is just to watch it closely and let it do its thing!
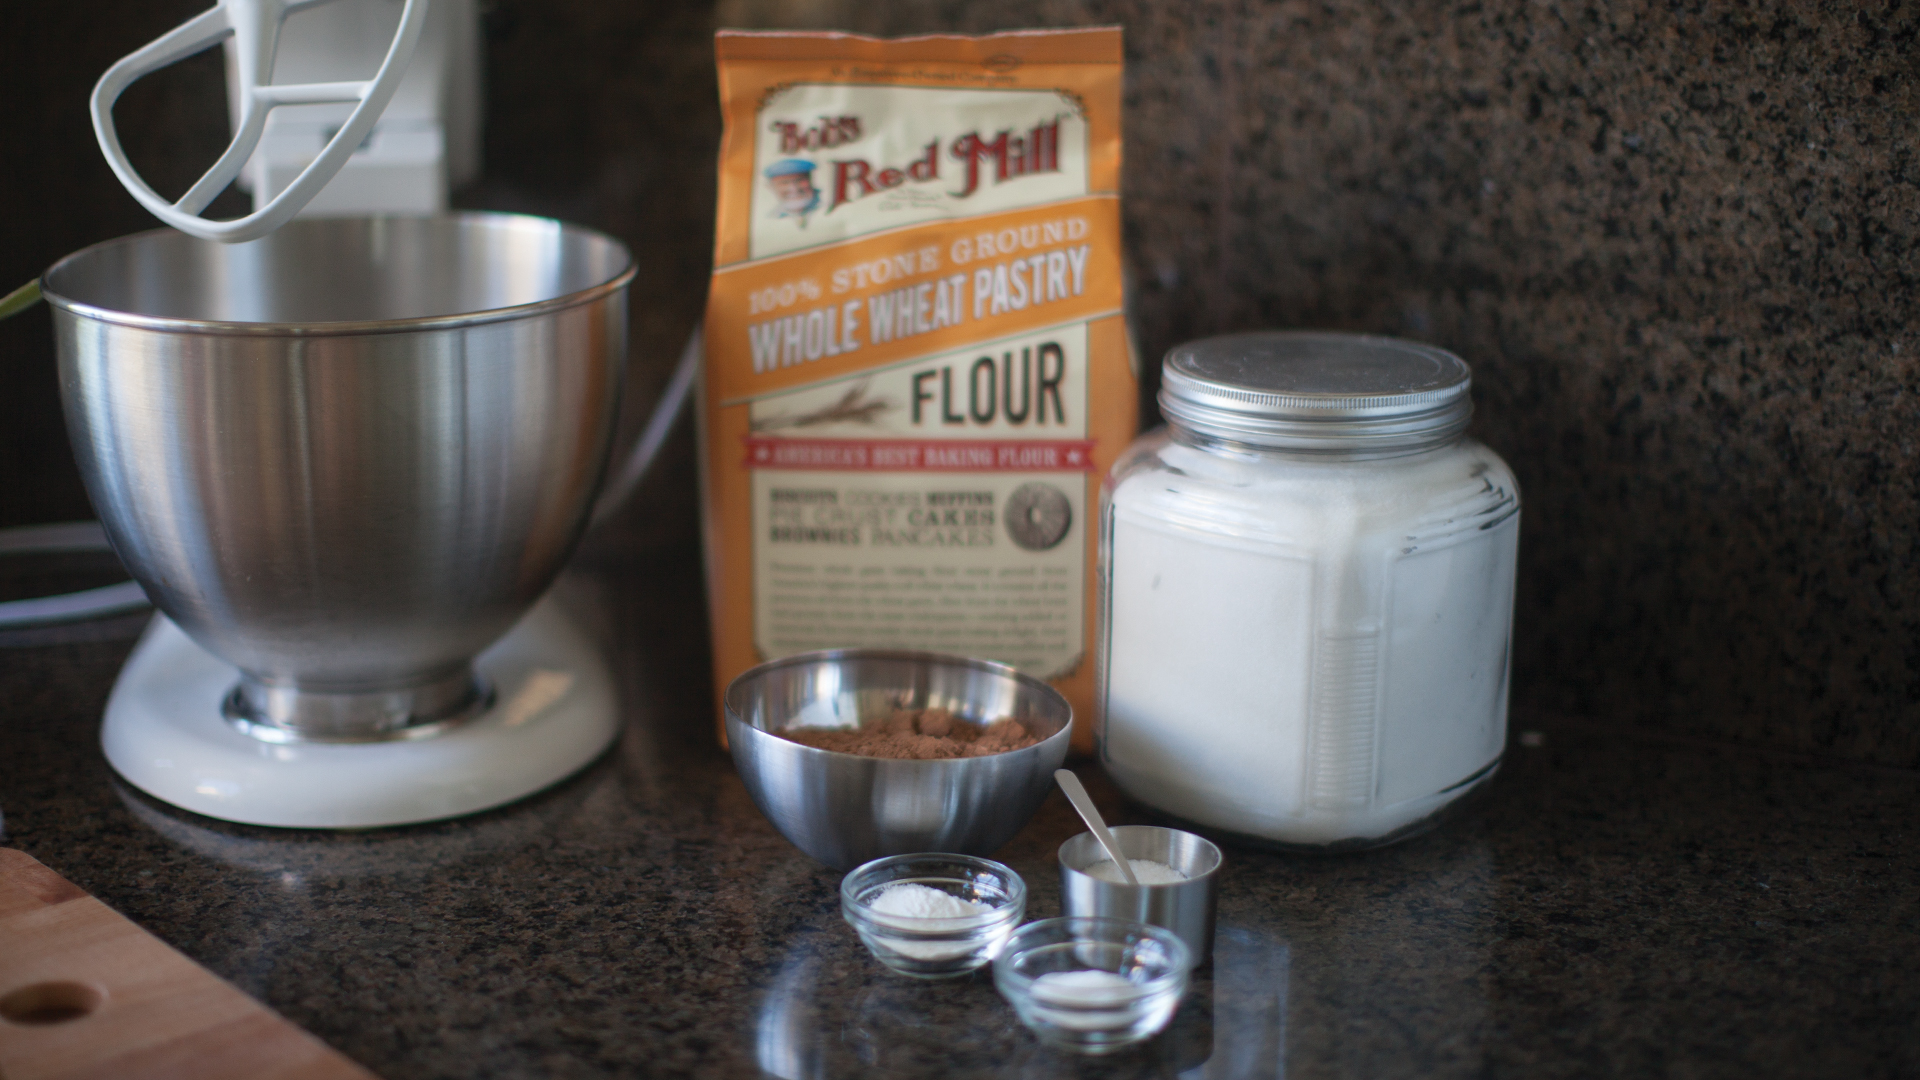
Ingredients:

1 1/2 C sugar

1/4 C water

1 tsp fresh lemon juice

1 tsp vanilla extract

1 1/2 C heavy cream

1 tsp sea salt

In a heavy saucepan over medium heat, pour in granulated sugar, water, lemon juice and vanilla extract and stir together. Stir continuously for 2-3 minutes with a wooden spoon, and then let it bubble on its own. Swirl the pan around about every other minute after this to ensure even cooking. Let it bubble vigorously. It will eventually turn a nice amber color, after about 9 minutes total. Make sure it doesn't over cook! Let it turn a dark golden brown and immediately remove from heat, as it can burn within seconds. With the pan away from direct heat, begin to pour in the cream very slowly, as it bubbles up quickly as a reaction. Stir until cream is fully incorporated, then add salt and mix that in too. Let caramel sauce sit to cool until just warm.

For the filling, you'll need:

10 large green apples peeled, cored and sliced (I used Roxbury Russets. They are like a Granny Smith, just not quite as tart, and slightly sweeter)

1/2 C packed light brown sugar

1/2 tsp ground cinnamon

1/4 tsp ground nutmeg

2 Tb fresh lemon juice

3 Tb cornstarch

1 tsp sea salt

Preheat oven to 400F. After you've prepared the apples, throw them into a large pot and then add brown sugar, cinnamon, nutmeg and lemon juice. Cover and cook over medium heat until the apples are just tender, about 10 minutes. Remove from heat, then add the cornstarch and sea salt, stirring everything well.

Pour the filling into prepared crust and spread evenly. 

Drizzle about 3/4 C of your prepared caramel sauce over the top of filling. Using your wooden spoon, push the apples around a little to let the caramel work its way into the crevices. Save the remaining caramel sauce for serving! And for topping ice cream, adding into your latte, the possibilities are endless...

Roll out the other half of your pie crust and cut into lattice strips, or however you like to design it! This is the best part of the process in my opinion. Make a quick egg wash by adding 2 Tb water to an egg, beaten and brushed over the top of the pie crust. Put the pie in the oven on a center rack. I like to place a baking sheet on the lower rack anytime I bake pies to catch any filling that might bubble over. Bake for about 1 hour. Halfway through, check on the pie to ensure even browning. Turn it if needed, and cover edges with aluminum foil if they're getting too brown. As you can see, I like a darker crust just as my own preference, but bake it to your liking. Let cool for atleast 30 minutes, until the caramel has stopped bubbling and the pie filling has had time to set. I finished the pie with a light sprinkle of sea salt.

Hanns Family Christmas

Every year, the holiday season seems to fly right by us in a whirlwind of busyness, over-planning of obligations, and, as much as I hate to admit it, total stress. Since we had kids, I've taken on the sudden pressure of trying to create a perfectly magical Christmas for our kids, which, don't get me wrong, I love doing. With our kids being so little, I've found that these few Christmases in their "little years" is an opportunity to start new family traditions that we can carry on for years to come. However, looking at my long list of "must-do's" and advent calendar ideas, I realized that cramming every single magical detail into this month will not make for a memorable Christmas. As much fun as doing a million crafts, baking cookies, building gingerbread houses, decorating every room of the house and making sure we participate in every event of the season (or else we'll have missed out!) is, over-doing it is over-doing it. I want to create magical memories for my family, yes, but I want those memories to mean so much more than just surprises and games (which inevitably leave us all exhausted anyway). 

We are trying to slow it down a little, stop spending so much money unnecessarily, and spend more time resting and enjoying Christmas in that rest as a family. So I thought I'd share a little bit of what we've been up to in preparation for Christmas! Because Christmas is the best!

First of all, notice that we have an actual hot cocoa station in our kitchen. We take our cocoa very seriously when we watch our favorite Christmas movies. We have already gone through a whole batch of cocoa... this jar is the second one! Yikes...

One of the most important traditions on my side of the family are these Dutch stroopwafels. My mom, grandma, sisters in-law, and extended relatives make hundreds of these little beauties one day a year. They are so delicious! If you've never tried one, you must. They are a buttery cookie split in half and filled with a caramel-like syrup. Put one over a hot cup of coffee to let it warm and you've got a match made in heaven. I finally bought my own pizzelle iron this year and I'm so excited to carry on this little tradition with my own daughter (now that she's big enough to get in on the hard work ;) 

We need to gift them all away stat, because they're all we've been eating the past week.

With Lumen turning four next month, this year is finally the year she will remember some of the details and be old enough to understand why we celebrate Christmas, so it was important to us to re-evaluate our motives a little. This year, we are a family of four. Lumen gets to share Christmas with a little brother, experience belief in Santa, anticipate Christmas morning, and most importantly, learn about what Jesus gave to us when he came into our world. We are setting the bar now for how she will view this holiday in the future. I wanted to get a nativity set that she'd be able to play with, but hadn't had any luck in finding one I really liked. So we decided to make our own! This was the craftiest I've gotten this year and other than baking cookies (which is top priority), this is the extent of our DIY-ness and I'm totally fine with it. I followed this genius blog post and had a painting party with my girl. It was pretty easy and so fun!

The three balls pictured above were Lu's contribution. They are a purple ball, a head of lettuce, and a yellow sun. All gifts for the Christ-child. Wonderful gifts if you ask me...

It's so easy to get caught up in the gift-giving and receiving aspect, especially for a little kid, and I've been worried about fostering behaviors of greed and entitlement (seriously, how does one teach a three year old not to beg for toys everywhere they go?) so that was another reason to pull the reigns a tad on shopping and doing every fun thing imaginable this year. We simply got them three toys a piece, plus a few stocking stuffers. It's so easy for us to think they need more or that's not enough, but in reality, they're so little and they don't need a thing! As a family, we have personally been dealing with the problem of accumulating so much more than we need or have space for, and so we simply decided to slow down on the idea of filling all the space beneath the tree. Especially since our three year old can't even handle the idea of parting with any of her current toys!

We also decided to forgo our usual do-something-creative-and/or-messy-and/or-expensive-every-day-advent-calendar and just schedule a few important traditions and festivities into the month. Instead of an advent calendar, we have been doing some research into the history of advent and what it really means and taking some time to observe it. I splurged a little and got this candle holder, then took some clippings from our tree and made a simple horizontal wreath for it. Each Sunday, we light a candle and simply just take the time to breathe, pray, and celebrate hope. Oddly enough, this is so much more life-giving than carrying out tasks assigned from the advent calendar ;)

 Don't get me wrong, advent calendars are so fun! And probably mean something more than the usual Pinterest-inspired ones I've created in the past. I've just personally made them out to be a crazy to-do list for myself in hopes of experiencing the perfect Christmas... Next year I'll just grab a pre-made chocolate-filled one, because if we're being honest, those are the best! The only daily advent "calendar" we've been doing is the Jesus Storybook Bible plan with Lumen. It's so great! If you don't have the Jesus Storybook Bible, I highly recommend it.

Some of our other traditions that have stuck are:

Getting our tree from Tappan's farm every Black Friday

Only putting lights on it

Choosing a night closer to Christmas to decorate it with ornaments (with cocoa and a good movie on)

Participating in 33 Days of Christmas Movies hosted by You Hate Movies

Seeing the Pioneer Square Christmas Tree followed by Zoo Lights

Strolling down Peacock Lane

Watching Home Alone and Home Alone 2 with friends

Attending our church's Christmas Eve candlelight gathering

The kids and I have also been doing some simple and free things like having Christmas music dance parties, coloring, checking out fun holiday books from the library, and having friends over in their pajamas to play during the day to make the most of wet and cold weekdays. Of course the calendar fills up pretty quickly with other fun events like holiday parties and family gatherings. I'd love to know some of the special things you and your families do every year!

Rosemary Salt

With the holidays now in full swing, I thought I'd share a simple recipe for a rosemary finishing salt I've been using on everything. I absolutely love rosemary. It has a wonderfully unique aroma and taste that compliments so many flavors, sweet or savory. Since I have a large rosemary plant flourishing in my backyard, I'm always on the lookout for ways to use it up, aside from throwing it on gift wrap or using itty bitty clippings for dishes every now and then. So I resolved on infusing it into some kosher salt and spreading the love with Christmas gifts and using it as a rub for roasts or sprinkling on potatoes, etc. in my own kitchen!

You'll need:

1 box (3 lbs) coarse kosher salt

2 large handfuls fresh rosemary

5 drops therapeutic-grade rosemary essential oil (optional)

First, place your fresh rosemary into a large stock pot, then pour entire box of kosher salt over and around the sprigs. Cook on medium and heat contents through until hot, about 10 minutes, and the salt becomes fragrant. Using a wooden spoon, stir occasionally, gently pressing and crushing rosemary to help release some of the natural oils, incorporating it into the salt. Remove from heat and add 5 drops of rosemary essential oil. Stir very well. Remove some of the larger branches from pot and carefully pour all of the salt through a sifter into a large bowl. Pour through and shake in order to remove the larger sprigs from the salt.

I took the remaining sprigs in the sifter and decided to chop them up and add them into the batch. Whisk salt to incorporate rosemary evenly throughout.

Divide the salt into desired sealable containers right away in order to preserve that wonderful rosemary essence!

Slowcooker Carne Asada & Peach Sangria

We are big fans of good carne asada. If we want to get Mexican food, we make sure to go where the best carne asada's at. I'm embarrassed to admit it, but after years of loving them, I'm new to making carne asada tacos! I think I was intimidated to make it and fall short of the authentic stuff we eat on a weekly basis, but I finally tried it and am shocked at how easy it was and how amazing it turned out! I guess you can't go wrong with the combination of fresh vegetables and spices thrown into a delicious marinade and slow-cooked for the best flavor. This recipe and method were a conglomeration of a few I've read through, and I'm quite pleased with the outcome. It's got a kick of spice, which balances nicely with some diced sweet potatoes added in. It makes for amazing tacos, but could also make great burritos, egg scramble, salad, nachos or as-is with some beans and rice. 

You'll need:

1.5 lb lean beef (I used a flat iron cut)

1/2 large white onion, chopped into large chunks

1 jalapeño, seeded

1 small handful cilantro

4 large cloves garlic, minced

3-4 Tb olive oil

1 lime, juiced

1 tsp smoked paprika

1/2 tsp cumin

1/2 tsp coarse salt

1/2 tsp fresh pepper

1/8 tsp cayenne pepper

1/4 tsp red chili flakes

2 medium sweet potatoes, diced

First, prepare your marinade. Add onion pieces, jalapeño, cilantro and garlic to a Vitamix or food processor. In a small bowl, combine paprika, cumin, salt, pepper, cayenne, and red chili flakes, then add lime juice and olive oil and whisk together. Pour into Vitamix and turn on low speed until a coarse paste is formed and all ingredients are finely chopped, but not pureed.

Heat a cast iron skillet on medium-high, add a little olive oil, and throw steak on, just searing each side until slightly browned (about 30 seconds per side). Remove from heat and place steak into a slow cooker. Pour marinade over meat and add diced sweet potatoes over and all around cooker. Cover and let cook on low for 6-8 hours.

Take steak out on a cutting board and slice thinly into bite-sized pieces, then add them back in to your slow cooker and mix everything together, letting the beef soak in the juices. 

For my very favorite tacos, I like to lightly sear some white corn tortillas on each side, and top with carne asada mixture, some heated black beans, fresh white onion, fresh cilantro, crumbled goat cheese, a slice of avocado and a squeeze of lime. A pinch of salt and a dash of hot sauce, and there you have it.

Since I had dinner already cooking early in the day, I decided some spicy red meat would pair so perfectly with fresh sangria on a nice summer evening. With some fresh fruit, essential oils and a cheap bottle of red wine, I whipped together this recipe so quickly, it was really hard to wait the rest of the afternoon! 

For this sangria, you'll need:

1 bottle of red wine (a cabernet, merlot, or red blend works!)

2 shots of triple sec

1 lime, juiced

1 naval orange (I juiced one half and sliced the other)

1 cup strawberries, sliced

1 peach, sliced thinly

2 drops orange essential oil* (optional)

3 drops lemon essential oil* + 3 Tb sugar (for simple syrup)

Directions:

In a half gallon glass pitcher or jar, add in triple sec. Throw in prepared fruit, fruit juices and orange oil. Now make your simple syrup by boiling a little water and pouring it over 3 Tb sugar, stirring and letting it dissolve until you have 5-6 Tb of syrup, then add 3 drops of lemon essential oil and stir. Pour syrup over fruit and juices, then pour the whole bottle of wine over the mixture, stirring well with a wooden spoon. Let sangria refrigerate for a few hours for maximum flavor. When you're ready to serve, pour into glasses and top with some of the fruit. This stuff is so delicious!!

Now grab some friends, drink some sangria and eat some delicious carne asada tacos and you won't be mad.

*Always make sure you are using therapeutic grade essential oils when using for consumption! 100% pure oil is the only oil that is safe to ingest, and store-bought oils, though labeled "pure," still have additives and harmful ingredients that are not safe for consumption. If you don't have therapeutic grade oils, just use some fresh fruit juice instead. 

Brioche Donut Holes

There is something so irresistible about fresh, buttery dough, fried and topped with sugary goodness! Donuts are one of those tricky sweets you crave any time of day, year-round, your whole life. I'm convinced of it. I feel like some people have specific aversions to desserts, like one having a preference for cake over ice cream, candy over cookies, chocolate over fruity sweets, you get the idea. But very seldom do I meet someone who doesn't like donuts! They are delicious and there is always an occasion for them. Period. My husband and I argue constantly over who makes the best donuts in Portland, and though I have my preferences, there are really no "bad" donuts anywhere! Give me a donut and I'm a happy camper. I will say that there are lots of different styles of donuts and each shop we frequent does them unique to their liking, which makes it a lot harder to argue who's are best! If you aren't from around here and ever choose to visit, please spare yourself the 2-hour wait at Voodoo and check out some really good shops like Blue Star, Coco Donuts, or Pip's, just to name a few. If you have not tried Pip's Original Doughnuts, you must! They make wonderful little donuts using a brioche recipe and finish them with phenomenal toppings. They are the little devils I crave on a regular basis. Unfortunately, we live on the other side of town from said shop, so I decided to try my own brioche recipe. I wouldn't call this a "copycat" recipe, but these babies definitely hit the spot on a morning when I craved Pip's but craved my pajamas even more. So here you have it, my homemade Brioche Donut Holes!

You'll need:

4 tsp active dry yeast

1/2 C warm whole milk

1/4 C granulated sugar

3 1/2 C bread flour (I used a mixture of half Bob's Red Mill Whole Wheat Pastry Flour and half Gold Medal bread flour)

1 1/2 tsp salt (I used Maldon flaked sea salt)

4 eggs

8 oz European style butter

Rice oil for frying (about 1/2 C)

Optional ingredients for topping: 

Nutella

honey

sea salt

cinnamon + sugar

Directions:

Combine yeast, warm milk, sugar and only 1/2 C flour in a mixing bowl and let sit for 5 minutes, until it's a little bit bubbly. Then, add flour and salt, mixing as you pour. After flour and salt are incorporated, add your eggs, one at a time. Mixing on low speed, add the butter (slightly softened) one chunk at a time. If you're using an electric stand mixer, use the bread hook attachment.

Knead dough for 5-10 minutes until it becomes smooth and has some elasticity to it. Add a little oil to your bowl, or grease down the sides, cover and let sit in a warm place to rise for 1 hour, or until it's doubled in size. I like to heat my oven to 100 degrees, then turn it off and let the bowl sit in there... works like a charm!

When the dough is ready, turn it out onto a well-floured surface and roll it out until it's 3/4" thick. Cut small circles and place them onto a sheet of parchment. I don't have a doughnut cutter, but I used half of a metal tea strainer and it cut them very easily to the perfect size. Let doughnut holes rise for another 30 minutes on the countertop. 

Heat oil in a cast iron skillet or high-heat pan on medium heat. Using tongs, drop donut holes in and fry until base are golden brown, then flip them over to brown on the other side. It only took me about a minute per side! You have to watch donut holes carefully because they cook way faster than regular sized donuts. Quickly pull them out and let them drain on a paper towel. 

Now for the fun part. Prepare the toppings of your choice. In a small bowl, I combined some cinnamon and sugar and dipped the warm donuts into it. In another small bowl, I whisked together some Nutella and raw honey and drizzled it over a few, and then sprinkled a little sea salt over another few to have a little variety of flavor.

Since we were indulging, I made myself a delicious iced latte to go with them. Donuts are great. Donuts and coffee? Match made in heaven.

This batch yielded 100 holes, so I only fried a dozen for the morning and just popped the others into a ziplock freezer bag, lining them with parchment in between each layer of holes. Two days later, I took out another dozen and let them defrost and proof in a warmed oven for about 20 minutes while we had company and they fried perfectly all over again. Yay!

Home Disinfecting Wipes

Another household item I've been meaning to try are disinfecting wipes. I used to buy Lysol or Clorox wipes to make cleaning bacteria-laden surfaces and messes quick and easy. They were not only really expensive, but full of toxins! I know they get rid of 99.9% of germs, but they also replace them with harmful chemicals. My home isn't perfectly green, but I've always been a little bit squeamish about using products like these, especially around the kids. I don't want to throw shade on anyone who uses these products, as I grew up around pure bleach and mainstream chemicals that get the job done well! I'm getting rid of items like these one by one because I've realized the possibility, affordability and ease of making stuff that's safe and actually work fantastically. I realize it's hard to cut out every single thing in a busy family's lifestyle that has any trace of chemicals in it, so I just want to share the ways we're becoming more mindful in using natural alternatives. 

I did a little bit of research and what I found was somewhat disappointing. Items like vinegar and baking soda are great, great things to clean with, and they are staples in my house for so many things! But there aren't a lot of green products that actually kill most of the bacteria. And I'm not even militant about cleaning my surfaces raw, because I know we need some bacteria to build those immune systems. But after reading through this experiment on cleaners done by a biochemist, I was pretty surprised to see that even Lysol fell short at getting rid of germs! The most effective tool was hydrogen peroxide! So I decided to use it in my wipes.

sh_blog_disinfecting_wipes_1.jpg

You'll need:

1 roll of paper towels, cut in half (I use Viva! The V-Flex ones are even better for scrubbing, I just used the plain ones because they were handy)

1 C hydrogen peroxide

1 C water, boiled and cooled

1 Tb castile soap

10 drops lemon essential oil

10 drops thieves essential oil (both lemon and thieves have amazing anti-bacterial properties! And the combination of these oils will leave your surfaces smelling wonderful)

1 container to fit the wipes in

Directions:

Place paper towel roll in designated container. In a bowl or measuring cup, mix all ingredients together and pour over paper towel roll slowly. Evenly drizzle the mixture over the inner and outer parts of the roll. Cover container and let sit on all sides a few minutes at a time until solution has evenly saturated the whole roll. Remove cardboard roll and disperse wipes from center. Voila! Get those germs.

sh_blog_disinfecting_wipes_4.jpg
sh_blog_disinfecting_wipes_5.jpg

Beeswax Hand Butter

Summer isn't summer without a few calluses and dirt under your fingernails! I love the summertime, but it definitely takes its toll on my skin. Sun exposure and digging around in garden dirt and sandy beaches have left my hands and feet so dry. But in my book, these are signs of a really great summer! 

My very favorite product is Burt's Bees Almond Milk Hand Creme, and one tiny jar, though expensive, lasts me months at a time. All it takes is a tiny amount to fully nourish and moisturize my hands after doing the dishes or working in the yard. So I used up the last of my jar today, and after looking at what it's made of, I realized I could make it myself! Using almost all the same ingredients (those I could pronounce anyway,) I whipped up a jar of essentially the same wonderful cream for a fraction of the cost. Love it when that happens!

This recipe made about 6 ounces of cream, so I filled a quarter pint mason jar for home as well as a 2 ounce baby food jar to keep in my purse! It should last me a while. Once I prepared my ingredients, it was a breeze to whip together. I decided to use Peace & Calming instead of grapefruit because it is my favorite! It's a blend of orange, tangerine, patchouli, ylang ylang, and blue tansy and it is so great for, well, peace and calming. I use it on my kids at nap time and bedtime and they love the scent, so I thought using it on my own hands would be a nice way to nurture my skin AND those babes any time of day.

You'll need:

1/2 C raw shea butter

1/4 C sweet almond oil

2 Tb beeswax, chopped

1 Ml vitamin e oil

1 Tsp aloe vera (I just trimmed a little off a few aloe leaves on my plant, sliced them and scraped the pure oil out! Store-bought aloe is easier, but this is just what I had on hand. Love my little aloe plant!)

20 drops essential oil (I used Peace & Calming)

Directions:

In a double boiler, add shea butter, almond oil, beeswax, vitamin e and aloe vera together and stir until all ingredients are completely melted (about 5-10 minutes simmering.) Remove from heat and let cool for another 5-10 minutes, then add essential oils and stir. 

sh_blog_handcream_2.jpg

Pour into desired containers (glass is best when using therapeutic grade oils) and let sit for a few hours, until it has completely settled and hardened. Use a minimal amount and massage deeply into skin. Peace & Calming is great to apply on your feet before bed to release tension and promote deep sleep. Even better when it's added to this awesome moisturizer!

sh_blog_handcream_4.jpg

Salted Honey Ice Cream Sandwich

Ice cream sandwiches have always been one of my favorite summertime treats since childhood. The combination of freshly baked cookies and creamy ice cream just can't be beat! Tyler took Lumen on an evening stroll last week to the convenience store and she proudly marched up the front porch staircase with an ice cream cookie sandwich in hand. When she took her first bite, she started giggling. I think it instantly became her new favorite dessert. Every night for the past week now, she's ever-so-sweetly asked Tyler if they can walk to get another ice cream sandwich. So, I was inspired to make a homemade version! I don't have an ice cream maker, so I didn't think it could be done until I came across some no-churn recipes that sounded pretty good. So I gave it a whirl, and lo and behold, my homemade ice cream dreams came true with very little effort!  So here you have it,

Salted Honey Ice Cream on Browned Butter Oatmeal Cookie Sandwiches

I dreamed up this little combination while craving something salty and sweet. Having grabbed a jar of local honey from the farmers market last week, sea salt + honey sounded too good to pass up. I've also had a craving for oatmeal cookies, so this was my opportunity to finally make them! I decided to brown the butter to give it a nice nutty sweetness, and it made a world of difference! Oatmeal cookies are great. But browned butter oatmeal cookies? Even better. Shoot!

First, make your ice cream. You'll need to freeze it for about 6 hours. I whipped it up the night before and stuck it in the freezer so I wasn't tempted to eat it before it was completely set... 

Salted Honey Ice Cream:

16 ounces heavy cream

14 ounces sweetened condensed milk

1/4 C honey

1/2 tsp sea salt

Directions:

Pour the heavy cream into a stand mixer (or large bowl using a hand mixer) and begin mixing it on low speed, gradually changing up to high speed until stiff peaks form (about 2-3 minutes). Then gently fold in your condensed milk, honey and sea salt using a wooden spoon or rubber spatula until all ingredients are incorporated. Be careful not to whip it up too much, as it will liquify easily. Quickly pour mixture into an airtight freezer-safe container and freeze for six hours.

Browned Butter Oatmeal Cookies:

1 1/2 sticks butter

1/2 C brown sugar, packed

1/4 C granulated sugar

1 egg

1/2 tsp vanilla extract

1 C flour

1/2 tsp baking soda

1/2 tsp salt

1/2 tsp cinnamon

1/4 tsp nutmeg

1 1/2 C rolled oats

Directions:

 Preheat oven to 375F. Place parchment paper on two cookie sheets and set aside.

In a small saucepan, melt butter and bring to a boil, then simmer and stir until it's browned, about 2-3 minutes. Set aside to let cool. Add sugars to a stand mixer. In a separate small bowl, whisk together flour, baking soda, salt and spices and set aside. Once butter has cooled, slowly drizzle it into the mixer (using a paddle attachment on low speed.) Once butter and sugars are combined, add your egg and vanilla and whip together until all liquid ingredients are well-mixed. Pour dry ingredients in and beat until incorporated, then add your oats and mix until just combined. Drop cookie dough* onto parchment lined (or ungreased) cookie sheets. Bake for 8-10 minutes, or until edges turn golden brown.

*I wanted larger cookies, so I made 6 balls of dough (about 3 Tb each) and gently flattened, making sure they were spaced 2-3 inches apart. This made 3 giant sandwiches, but if you're entertaining or want 6 normal-sized sandwiches, make a dozen cookies! The larger cookies took about 13 minutes to bake through.

Once cookies have completely cooled, prepare your sandwich assembly by placing them upside-down on separate squares of saran wrap. You'll have to work quickly, as ice cream melts quickly! Take your ice cream from the freezer and scoop it on each sandwich base, cover, gently press together and immediately wrap and place back in freezer. Let sandwiches freeze for about 30 minutes to let the cookies harden and ice cream set again. Serve and enjoy!


Thai Basil Mojito

The past week has been very hot and humid here in Portland. Whenever this kind of weather rolls in, which is so normal for almost all other regions of the country, we Pacific Northwesterners act like it's the end of days. We are so used to crisp air and mild temperatures, that anything above 80 degrees gets people squirming. Most Portlanders don't have A/C because it's rarely necessary, so most restaurants and bars become packed to the brim around mid-day and into the evening with people wanting something cold to drink. I'm not sure the lack of A/C is the real reason you see everyone day drinking around here on any given day, but we'll still go with it. Since having kids, sometimes we like to relax by putting them to bed, mixing something up, and watching Netflix or front porch people-watching. And since it's felt like the tropics around here, I was in the mood for a tropically flavored and refreshing libation tonight! So without further ado, I call my concoction the Thai Basil Mojito.

I love the combination of lime, coconut, and basil! I love a good mojito too, so I decided to try a loosely-based version of one using fresh basil instead of mint. For the coconut part, I actually tried making a "sweetened condensed coconut milk," which, in theory sounded amazing, but when I mixed it with sparkling water, it ended up with that curdled milk consistency. Not too appetizing, so I tossed it and instead made coconut simple syrup! It ended up being perfect. 

You'll need:

A wedge of lime

4 Tb sugar

4 Tb sweetened shredded coconut

2 oz rum

A dash of bitters (I used Scrappy's Lime Bitters)

2-3 fresh basil leaves

Sparkling water 

Candied lime peel for garnish (optional!)

Directions:

First, make your coconut simple syrup by adding your sugar, coconut and about 3-4 Tb of water to a small saucepan. Bring to a boil and then simmer for 3-4 minutes, until the sugar is dissolved and coconut is tender and fragrant. Let cool, and strain into a small container. 

In a high-ball glass, put fresh basil leaves and 2 Tb of the coconut simple syrup in first. Muddle lightly, careful to extract the flavor of the basil but not bruise it too much. I usually just turn my muddler about 3 times into the bottom of the glass. Squeeze some fresh lime juice in there, then add a shot of rum and a dash of bitters to the mix. Fill the rest of your glass with ice and top the remaining space off with sparkling water. I used plain sparkling water, but I feel like Coconut La Croix would make it even better! I'm going to try it with that next time. Stir the drink using a swizzle stick or long spoon and garnish with a fresh basil leaf or candied lime peel if you're feeling fancy.* Enjoy!

*I just rolled some sliced lime peels in sugar for my garnish, but if you want to wow your guests, Martha Stewart has a great recipe for candied citrus peels that you can eat! Thanks, Martha.

Summer in the City

With this being the first official week of summer, I thought I'd share some of what we've been up to and what we hope to accomplish in the next couple of months. Summers in the northwest are nothing short of magical. Everything is lush, the days are hot and mild, the evenings warm and peaceful. Everyone in the city is out, all hours of the day. I forget how populated Portland is until the sun comes out! We live on a major bike path in the city, and traffic is at an all-time high on our street this time of year. The evenings have been so perfect lately, and we've taken advantage of them by watching our 3 year old trike back and forth while having a beer on the porch and chatting with the neighbors. 

Since this season seems to fly by every year, we made a checklist of things to accomplish in the next couple of months to ensure a fun time to be had by all. Here's what we've got:

Lots of swimming and picnics on Sauvie Island

Make and can our annual supply of berry jam

Lots of evening walks

See a concert at Edgefield 

Hike the Oneonta Falls trail through the creek

Go cliff jumping at Dougan Falls

Dine al fresco as much as possible

See movies outdoors 

Take a family beach trip

Have a water fight

See the new elephant exhibit at the zoo

Go to the movies

Go camping

I'm sure there are to be a few more things added, but these are our most important to-dos. Last year, I was pregnant and wasn't up for a lot of sun or adventure during the hotter months, so I'll be making up for lost time this year, with a six-month-old now in tow!

I consider myself extremely lucky to get to stay at home full time now with my kids and soak up the summer with them! For the most part, we roam around the front and back yards, splash in our kiddie pool, take walks to Piccolo Park, venture out with friends, and whatever else floats our boat. I usually tote the kids around all day, and then when nap time rolls in, I take advantage of quiet and do something for myself. My favorite afternoon pick me up is a good book and a caffeinated beverage, and lately, shaken iced peppermint green tea is my jam! It used to be my drink of choice when I worked for Starbucks (because what Millennial hasn't worked for the Siren at some point in their life?) and it's the perfect refreshing picker-upper on hot afternoons. 

My love for peppermint oil inspired me to make a simple syrup, which couldn't have been easier. All I did was pour some sugar in a small container (about 1/3 cup), add some boiling water to it very slowly, and stir until it was a slightly thick (not too watery) syrupy consistency and all the sugar had dissolved. I then added 2 drops of peppermint and it was the perfect potency. 

For the tea, I used six packets of Tazo Zen green tea, threw them into a half-gallon pitcher, and filled it halfway with hot water (almost to boiling point.) I let the tea steep for about 5 minutes as opposed to 4 because I like it on the slightly more bitter, stronger side. Then I added ice to the other half of the pitcher and let it cool. For my "iced venti 2-pump peppermint no water shaken iced green tea" (I'm not sure if that is the correct way to order it. Thank goodness all that nonsense being drilled into my brain didn't quite stick), I poured about 16 ounces of tea into a cocktail shaker, added some ice, and topped it with about 2 Tb of peppermint syrup. I slapped a cold pint glass over it and let out my inner bartender. Shake, shake, shake. Grab the strainer, pooouuur that drank, and snap it. Shaking the tea isn't necessary, but it helps to get your tea chilled and well-mixed without watering it down too much. Plus, it's bubbly and fun. 

If you want, you could add a little lemonade to the shaker and make a green tea lemonade! I love that stuff. This drink is so simple and delicious, and it gives me that much-needed second wind on days when the sun has zapped me into a coma. 

I love summertime so much! It's my mission to enjoy every bit of it as possible so that we can ring in my most favorite season, fall, with a proper welcome. Is there anything we should add to our list? What are some of your summertime must-dos?

Household Cleaners

Since my recent purchase of essential oils, I've been excited for the multitudes of household items I can make with them. I've wanted to rid my home of toxins for a long time now, but it's been hard. Natural household items I've purchased in place of the powerful chemical-filled ones I've always used were never as effective, and were always more expensive! And a lot of what is deemed "natural" still has sketchy ingredients smashed in there due to loose regulations on labeling. So with that, it never really bothered me to just keep buying the chemicals that get the job done. 

A friend of mine introduced me to Young Living essential oils and when I finally decided to get the kit, I started looking up what I could make with them. I didn't know I could make just about anything I could imagine! And that it would be extremely easy and cheap since I already had most of the ingredients for this stuff already in my home. I ordered some beautiful amber bottles from AbundantHealth and whipped up each of these in a matter of minutes. I really don't use many other products to clean with, so this is my minimal collection I keep under my kitchen sink. The best part is, I don't have to keep them locked away because they are green as green can be! They won't hurt my kids or the environment, being washed down the drain. Another perk is that my whole collection of cleaners cost a grand total of $7.

Insect Repellent:

I live in an old home where spiders and ants roam quite freely. I've used Raid on ant infestations, and spray spiders as I see them, but the toxic smell lingers so strongly that we've actually just learned to live with these pests because they're more tolerable than the spray! And it's usually only effective for a few days and like clockwork, they return. I heard peppermint essential oil does the trick, so I tried it, and I'm still in shock of how effective it is. I filled a 16 ounce spray bottle with water and added 10 drops of peppermint. I spray any area insects can get in– around door frames, windows, vents and any crack in the floor. The first time I tried this, I didn't see a single ant in a full week (and normally I smash about 50 a day), as well as no sign of a spider in an entire MONTH. The cost of Young Living's peppermint oil per drop comes to about 10 cents, so this repellent costs me a DOLLAR. Win.

Glass Cleaner:

I've always used distilled white vinegar for glass, which is a trick my mom taught me years ago and it works so well! Half vinegar and half water in a spray bottle. However, the smell is quite pungent. So I just added 10 drops of lemon to the mix and the smell is much more bearable now! Beautiful glass every time. Lemon costs 5 cents per drop, so with the vinegar at 16 cents, this cleaner costs me about 66 cents.

All Purpose Cleaner: 

This spray works great! I use it on everything from countertops and stovetops to cabinets and baseboards. It cleans really well considering all the gunk I have to scrub on a regular basis (dried-up kid foods cover most of my furniture and walls...) I dissolve 1&1/2 teaspoons of baking soda in a little hot water and add it to a 16 ounce spray bottle, then add 2 tablespoons of castile soap, 2 tablespoons of hydrogen peroxide and 5 drops lemon + 5 drops purification. Then slowly fill the bottle with purified water and gently shake. This stuff costs me about $1.34 total.

Disinfectant Spray:

This stuff is super useful in my home. I usually spritz it over an area right after I use the all purpose cleaner, like after I've prepped raw meat, or cleaned up a diaper gone awry, or whatever. It's just 1/2 vinegar + 1/2 hydrogen peroxide + 10 drops of tea tree oil in a 16 ounce bottle. It cost a grand total of $1.60!

Soft Scrub:

I love this stuff! It works so well! I use it on my sinks, toilet, shower and tub, and it leaves them all SO clean. It's wonderful. And it only cost $2.47 per batch.

I never thought I'd be this excited about cleaning products, but when I'm kicking toxins out of my house while using the best ingredients, with little effort AND saving tons of money, I'm actually giddy. I think the only thing worse than cleaning is spending tons of money on supplies AND having to use them. Now that I'm not dropping that kind of cash on the boring stuff, I feel a lot less guilty about spending it on things that are way more fun at Target!

I don't mean to sound like a broken record about essential oils, but they have changed the way I do everything! They've transformed my beauty routine, cleaning, first aid, and generally the everyday behaviors of me and my kids. The integrity of Young Living's oils is unmatched and I really am so thankful I was introduced to these little wonders. I wish I could buy them for every single one of my friends and family. I could not recommend them any more. If you are hesitant about them or waiting to buy them, I completely understand. I held off for months and months, very leery of the chunk of money up front with the question of how they'd pay off. I just want to say that I was a total skeptic turned believer after the day to day of them winning me over with every opportunity I've given them to work their magic. Granted, I haven't seen 100% results in every single thing I've tried, but overall, I've been very surprised at how effective they've been and have really helped had a need arisen. I don't say all this to make any money, and I know that sounds sketchy since you automatically become a "distributor" when you purchase a kit as a wholesale member. I legitimately love this stuff and am so happy to be learning more and more about them and seeing so much of the masses being turned on to essential oils in place of drugs. If you do want to jump in to the world of essential oils, I can tell you that you will never regret it for a second. If you do want to join me on this little journey, you can anytime and there are a million resources that come at this starting point, so you'll never be alone. It's not as overwhelming as you may think :)

Chicken Pot Pie

For the past week, I've asked Lumen what she wants for dinner every afternoon, thinking she'd offer up her rolodex of usual requests like Goldfish, strawberries, string cheese or just chocolate. She's got exquisite taste, folks! My kind of girl. But to my surprise, she suggested chicken pot pie. Every single day. So I figured I should comply. It's got your meat, seasonings, and delicious veggies all wrapped together in a flaky, buttery crust. Initially, I kept brushing off her request because of the idea of making pie crust and rolling it out. It's just so much easier to roast some veggies and grill some chicken! But the more she suggested it, the more it sounded too good to pass up. This pie crust actually took me less effort than crusts I've made in the past, and it was even more delicious! So here is my version. Lumen scarfed her entire adult-sized piece (as did we!) It's soul-satisfying, easy, and most importantly, toddler approved.

For the filling, you'll need:

2 chicken breasts, or about 3 cups shredded

1/2 C butter (1 stick)

1 C chopped onions (I used 1/2 C red + 1/2 C green)

3 medium carrots, or about 2 C

3 cloves of garlic, minced

1 1/2 C broccoli

1 1/2 C sweet potatoes

1 C celery, or about 2 large stalks chopped

1 C fresh parsley

Salt and pepper, to taste

1/2 Tsp dried rosemary

1/2 Tsp dried thyme

1/2 C flour

2 C chicken broth


For the crust, you'll need:

1 1/4 C flour (I used Bob's Red Mill Whole Wheat Pastry Flour)

1 Tsp sugar

1/2 Tsp salt

1/2 C cold butter, sliced

3 to 5 Tb ice cold water

1 egg, for wash


Directions:

Preheat oven to 400F. First, make your crust. Whisk together flour, sugar and salt in a medium bowl. Add your cut butter pieces and blend them thoroughly with a pastry cutter (or a fork) until it resembles coarse meal and no large chunks of butter remain. Add your ice water, a tablespoon at a time, and stir until it starts holding together when squeezed. Don't over mix! Form dough into a ball, wrap, and refrigerate while you make your filling.

I like to prepare all my ingredients at once. Dice all of your vegetables, then throw your chicken in a frying pan to cook. I like to cook them over medium-high heat in a tablespoon of olive oil for just about 2 minutes per side. It will keep the chicken really juicy. Once it's finished cooking, shred it. In a medium to large pot, melt the butter. Add carrots, broccoli, sweet potatoes and onions and sauté for about 2 minutes, until they've softened a little. Then add your garlic, salt, pepper, and flour. Mix well. Pour in the chicken broth slowly and stir. Now add your celery, parsley, rosemary and thyme, and stir continuously for about a minute or two, until the sauce has thickened a little. Add your shredded chicken to the pot and remove from heat. 

Take out your pie crust and knead it to break it in a little. Split it in half and roll out each half circle as large as you can make it. Fill your pie pan or skillet with one half and push the dough into the sides and up to the top. Take your filling and pour it all into the dish, spreading it to fill. Now take the top half of the dough and cover the filling. Because this recipe makes for a light, flaky crust, it's very delicate. I just took extra pieces hanging over the edge and patched them onto the exposed parts of the perimeter, until the whole top was covered. Next, make an egg wash by whisking an egg and a tablespoon of milk or water together, and brush it over the top. This will keep your pie crust from drying out too much and give it a nice glaze to brown.

Bake your pie on a center rack with a baking pan below (in case of bubbling over) for about 25 minutes. Take it out when the top is a nice golden brown. The filling is already cooked, so it's really just up to you to bake it to your liking, whether its more doughy or crispy! When it's ready to come out, let it cool for about 10 minutes before slicing. Enjoy!

Tyler had to sneak Ever into my shot, and I quite like how it came out. This face was too cute not to throw in here...

Perfect Chocolate Cake

This cake. Where do I even begin? Let me just start by saying I am a huge fan of chocolate cake, and there is always an occasion for it. I've made this cake so many times now that I practically have the recipe memorized, because it is that good. I even used this recipe for my brother and sister-in-law's little wedding cake, and they loved it. It's maybe the only dessert I've ever made that I keep craving on a regular basis (other than Nestle Tollhouse chocolate chip cookies, because, well, duh.) It is dangerously addicting, and I don't even care. I will start running if I have to, just to keep eating cake. And running is the worst! 

The key to making this cake so divine is by achieving a fluffy, moist consistency. I know. Moist is such a gross word, but there is no other word to describe perfect chocolate cake. Please forgive me.

Another key is flavor. You want it rich, but not too rich. Buttery, salty, chocolatey-sweet with a slight hint of bourbon and vanilla. I'm not a huge fan of frosting, and I firmly believe you can kill a cake with too much sugary frosting. If you're a slather-on-the-frosting personality type, I'm sorry, but you're wrong. I mean, you're not completely wrong. Frosting is essential on a good chocolate cake. But take it easy, for Pete's sake. That is why I love a good frosting that's a bit fudgier than it is just sugary. This frosting is a little more buttery and melts in your mouth. I like to think it brings out the flavor of the cake instead of masking it with sweetness. 

For the cake, you'll need:

2 C flour (I used Bob's Red Mill Whole Wheat Pastry Flour)

2 C sugar

3/4 C cocoa powder

2 Tsp baking powder

1&1/2 Tsp baking soda

1 Tsp salt

2 oz espresso or coffee

1 C milk

1 shot bourbon whiskey (optional!)

1/3 C vegetable oil

1/3 C mayonnaise or sour cream (optional! People get so grossed out by mayonnaise. But trust me on this one. It makes it WAY more moist and fluffy. If you choose to omit this ingredient, just up the vegetable oil to 1/2 C)

2 eggs

2 Tsp vanilla extract


For the frosting:

2 sticks butter (1 C), melted

3/4 C cocoa powder

3&1/2–4 C confectioner's sugar

2–3 Tb milk

1 Tsp vanilla extract


Directions:

Preheat your oven to 350F. I recommend convection heat, but it's not necessary! Whenever I don't use convection, I just rotate the pans halfway through the baking process to ensure evenly baked layers. I prepare two 9" cake pans by spraying them with canola oil AND dusting them with a layer of flour. There's nothing worse than putting all the work into the batter only to have the cakes stick when you try popping them out. I know from multiple experiences. 

Take your flour, sugar, cocoa, baking powder, baking soda and salt and mix them well using a paddle attachment in an electric stand mixer, or by hand, ensuring there are no more clumps in your cocoa powder. Once your dry ingredients are mixed, add all of the wet ingredients. Mix on medium to high speed for about 2 minutes, until you see lots of bubbles in the batter. This will make for a much fluffier cake! Make sure you scrape down your bowl and then mix again before adding your batter to your pans. 

Distribute your batter evenly between your two prepared pans, and set them side by side in the oven. I like to pop a baking sheet on the rack below in case of any bubbling over. Bake for 30-35 minutes, or until a toothpick inserted in the center comes out clean. Let cakes cool for about 10 minutes, then pop them out onto a parchment-lined sheet.

Side note. Just in case you thought this was a quick, easy, mess-free experience for me, here is my actual viewpoint. One kid claws my feet, and the other begs for cake batter. In a sea of dirty dishes and sticky counters. I never said it would be easy, but it's most definitely worth it. Trust me.

Just keeping it real, folks! Moving on...

While the cakes bake, start your frosting. Add your cocoa powder to your mixer and pour that melted butter over it. Now your vanilla. Now, mix well to combine. Add your sugar and milk to the mix, alternating between the two in small amounts, until you've  reached a thick, creamy consistency. Beat on a high speed for about a minute.

Apply a thin layer of frosting in between your cakes, stacking them. Frost your cake to your liking! I like to use a frosting bag with a wide tip to swirl a layer over the top and squiggle a layer around the outside, ensuring evenly-dispersed frosting over the whole thing. Turning your cake while you work, smoosh that frosting down using a butter knife to work it into the sides and top. I like to sort of swirl and smash, using a "homestyle" frosting method that's quick, pretty, and forgiving of any mistakes. 

Whatever it looks like, it's just bound to taste incredible. Now eat dat cake!

sh_blog_chocolate_cake_12.jpg


Orange + Thieves Soft Scrub

Another product I use all the time is Soft Scrub with Bleach. It gets the job done so well and leaves my sinks and tub sparkling, but is unfortunately chemical ridden and very toxic to be breathing in. It even leaves behind a lot of residue, which makes me nervous about putting my babies' bare booties in that bathtub. So I wanted to try a natural recipe, but was doubtful about getting the same results. Well, I'm so happy I tried, because this stuff was not only a breeze to make, but worked SO WELL. I didn't even have to let it sit! I just started scrubbing away and watched my sink whiten before my eyes. It didn't even take a lot of elbow grease, just gentle circles with my brush and I was finished. Not only am I not having to hold my breath while I scrub, but I can breathe IN that wonderful combination of orange and thieves, which is great for your respiratory health anyway. Win-win.

Here is the before. Gross, I know.

A small dollop on your brush or sponge will go a long way. I did my whole sink + drain with less than a tablespoon!

And the after. Woohoo!

Ingredients:

 3/4 C baking soda

1/4 C castile soap

1 Tb hydrogen peroxide (optional! You can substitute a tablespoon of water instead)

1 Tb vinegar

10 drops orange + 3 drops thieves essential oils

Directions:

Mix together baking soda, castile soap and peroxide. Very slowly, add the vinegar. It's important to do this slowly, or it will bubble up really fast in reaction with the baking soda. Finally, add your oils. You are done! I stored my soft scrub in a soap dispenser and keep it under the sink. I believe it's better for the peroxide to stay out of the light. 

A quick note on orange and thieves. I used both because they exhibit antibacterial and anti fungal properties. Orange is a natural whitener and its acidic nature cuts grease and hard stains nicely. Thieves is an all-around miracle worker! It thoroughly cleans surfaces and neutralizes odors with its spicy aromatic blend. It's that extra kick that leaves hard jobs sparkling. I love these oils. Thieves comes in the Premium Starter Kit from Young Living, and I purchased orange separately (which is quite inexpensive and comes in a larger 15ml bottle.)

Lemon Joy Dish Soap

Dish soap. Just another household item that is SO easy and inexpensive to make. I've tried a few recipes and they were either too watery, or left residue, or just didn't get the harder jobs done. So I finally came up on this one, which has a really good sudsy, slightly thicker viscosity. It has worked the best, in my opinion.

You'll need:

2 C water

1/4 C grated castile soap flakes (I used Kirk's)

1/2 C liquid castile soap (I used Dr. Bronner's)

2 Tsp washing soda

1 Tsp vegetable glycerine

Essential Oils (I used 5 drops of Lemon and 3 drops of Joy)

Liquid soap dispenser

Directions:

Bring water to a boil and add your soap flakes. Stir until they've dissolved. Add the rest of your ingredients and stir for a minute until everything has dissolved. Carefully funnel soap into your dispenser and you're done! It takes about 24 hours for the soap to settle, but I used it right away and it worked fine.

The mixture of lemon and joy is one of my favorite essential oil combinations! It's so uplifting and smells delicious. A really great scent for summertime, or any time for that matter, and makes me actually look forward to scrubbing some dishes just to catch the aroma. Lemon does a great job of cutting grease too! Both oils come in the Premium Starter Kit from Young Living. Even more proof to me that this investment of my kit purchase is paying for itself a thousand times over. I really do love this stuff.

Buttermilk Strawberry Scones

I had a craving for something sweet and bready today (which isn't that unusual) and strawberry scones sounded too good to pass up! So I looked up a couple of recipes and decided on combining them into this cinnamon roll-esque scone, adding fresh Mt. Hood strawberries to the mix. I'm a big fan of scones that are moist, lightly crunchy on the outside and perfectly soft and biscuity on the inside. Rolling them with a layer of butter, cinnamon and brown sugar was sure to keep them from drying out too much, and give them a nice sweet little crunch on the outside and gooeyness on the inside. So I took the idea and rolled with it. Pun very much intended. You're welcome. 

Mount Hood strawberries are all the rage here in the Pacific Northwest. They are freshest every first week of June and yield a perfect balance of sweet and tartness. They are so delicious, and hold up excellently both baked and cooked down into preserves. They are my jam. Again, pun intended. You're welcome.

Dough:

4 C flour (I use Gold Medal Better for Bread)

2 Tb baking powder

1/2 Tsp salt

1/3 C sugar

1/2 C butter (cold, sliced thinly)

1 Pint fresh strawberries

1 & 3/4 C buttermilk 

Filling:

1/2 C butter (softened)

1/2 C brown sugar

1/4 Tsp cinnamon

Icing:

1 C powdered sugar

2 Tb + 2 Tsp milk

Directions:

Preheat oven to 375F. Line 2 baking sheets with parchment paper. I like to prep all my ingredients beforehand so it's easier to focus on the mixing and baking process without too much stuff in my workspace.

Wash and dice strawberries into about 1/4" pieces so they are easier to incorporate into the dough later. Lemon essential oil is AWESOME for washing fruit! Fill a bowl or your sink with cold water and add a drop of lemon, then let your fruit soak for a minute. Voila! Perfectly sanitized produce. 

For the dough, throw all your dry ingredients into a medium mixing bowl or electric stand mixer and blend together. Add cold pieces of butter and blend well using a pastry cutter until they are but small crumbles blended with your flour mixture.

Next, add your buttermilk by slowly pouring while mixing on medium speed. Very important: do not over mix! Only mix until the buttermilk is just incorporated and stop! Over mixing will result in a tougher, chewier consistency. Add your strawberries and mix again until they are just blended, again, careful not to over mix.

Turn dough onto well-floured surface and sprinkle top with flour. Roll out into a large rectangle.

Prepare your filling by whipping together soft butter, brown sugar and cinnamon until it's a smooth consistency and spread evenly over your rolled out dough.

Carefully roll your dough starting from the longest edge, and cut into about 1 1/4" slices.

Place each roll onto parchment lined sheets, about 2" apart. Bake for 25 minutes, or until edges are just golden brown. Take out and place each scone on cooling rack. 

Prepare your icing by whisking together powdered sugar and milk until no clumps remain, and drizzle over scones.

Enjoy while they are still warm and melty! So good.

Minted Rose Lip Balm

I love lip balm. A little too much. I buy new kinds all the time, and discover hoards of half-used tubes in my purses, bathroom drawers and car. Needless to say, I am ecstatic at having just made my very own with natural ingredients and pure essential oils that I already have stocked in my house. I love peppermint + rose! Especially with the hot and dry summer months already here, it's such a refreshing combo that will always be in my bag. 

You'll need:

1.25 ounces beeswax

1 Tb shea butter

3 Tb coconut oil

2 Tb almond oil

1 Tb jojoba oil (optional)

2 Tb rose water

10 drops peppermint essential oil*

3 drops Joy essential oil (optional! I added it to up the floral ante a bit. It's a wonderful blend with a little bit of rose in there)

5 1-ounce containers to fill

*I use essential oils from Young Living because they are 100% pure therapeutic grade. Make sure you have quality essential oils, as many store-bought oils are perfume grade and can be harmful if ingested! Many are even labeled 100% pure, as FDA requirements allow that sort of labeling even if they are only 10%, which many are. You can definitely tell the difference! I've used up almost whole bottles of lower grade oils when making candles and skin products in the past and their scents were very faint and didn't have the same health benefits as I've experienced with Young Living. Moving on...

First, chop up your beeswax like you would baker's chocolate. I've grated it before and it was the biggest pain getting all the wax out! Next, melt it down in a double boiler. I used a little metal milk pitcher in a medium sized pot of boiling water. Then add your shea butter and stir until it's melted down as well. Turn off heat and add all your oils and rose water to the mix. You're going to have to work fast at this point, stirring rapidly so the wax doesn't harden with the addition of cooler oils. Have your clean containers ready, and pour your mixture directly into each container quickly and carefully (I had to use an oven mitt to grab my mixture out.) After you've finished pouring, return the pitcher or bowl to the hot water to break up remaining wax inside so it's easier to wash. Voila! You have a stash of deliciously moisturizing lip balm. They make great little gifts too!

Both peppermint and joy come in the Premium Starter Kit I got from Young Living. This was absolutely the most valuable purchase I've made in a while. So many great oils + a diffuser and some other goodies for over half the price it retails for! If you want the best value, I HIGHLY recommend this kit. You can sign up for free as a wholesale member to save 24% off every single purchase too!


Whipped Pomade

I decided to look up recipes for hair creams after spending way too much money on those tiny little tubs from the salon. My husband is a little bit picky about product after trying several different brands that just left his hair feeling too stiff, waxy, dry or greasy. So I thought I’d give it a shot and, if he liked it, save some money in the long run! I put together this recipe, which is just a combination of a few different recipes I pinned. I ended up using a little bit too much coconut oil the first round, so I actually made two batches and used less oil in the second so it evened out. That is why I ended up with a big jar of it. I’m actually happy I goofed, because I ended up loving it and using it everyday on my crazy thick hair! So if you want a bigger jar to share, I suggest doubling this recipe.

You’ll need:

1 oz beeswax, chopped finely

1.5 oz raw organic shea butter

2 oz jojoba oil

1 oz coconut oil

Essential oils, about 6 drops. I used Young Living’s Tea Tree and Stress Away, 3 drops of each!

I decided to add tea tree because it can naturally soothe an itchy scalp and dandruff. I also added Stress Away because I love the smell. It’s a blend of a lot of good stuff including cedarwood, which promotes healthy hair growth! Both of these oils come in the Premium Starter Kit from Young Living.

In a double boiler, melt the beeswax down to a liquid, then add your coconut oil + shea butter. Stir until all is melted. Remove from heat, then add your jojoba oil and essential oils. Pour into a glass jar or container and let cool. Once cooled, whip it up. 

A little bit goes a long way! I usually just use a fingertip’s swipe, run it through my hands, then scrunch it evenly through the ends of my wavy hair for texture and moisturization on those dead ends. Bonus! This stuff is super good for your skin, so I generally rub anything remaining into my hands. I love that this stuff doesn't leave my hands feeling sticky or goopy, but actually moisturizes them too!

Lavender Laundry Soap

I’ve always been a big fan of Gain laundry detergent because it smells amazing. When Tyler and I were dating, his clothes always smelled so good. So I hunted around his apartment and took note of his laundry detergent. Since we dated long distance and only saw each other every few months, I started using Gain so I could smell him (he’s not a cologne guy, so this was my best shot at being a creepy girlfriend and breathing in his scent when I missed him.) Since we’ve had kids, it always made me a little uncomfortable washing their clothes and blankies with the toxins in such delicious smelling detergent. Especially now that my second-born started teething and sucking profusely on any nearby item of clothing. So I decided to try making my own with natural ingredients! Here is the first recipe I’ve tried that I like, and it cleans clothing really well. It’s borax-free and still smells great with the addition of pure lavender. Also, it was so inexpensive and super easy to make.

You’ll need:

1/2 C washing soda

1/2 C baking soda

3/4 C Dr. Bronner’s Unscented Castile Soap

2 gallons very warm water

10 drops lavender essential oil

2 gallon containers for storage

Add washing soda to a very large bucket or pot, then cover with ONE gallon of hot water and whisk well to dissolve. Add baking soda, then the last gallon of hot water and whisk again. It's important to whisk these separately, otherwise it gets SUPER clumpy and hard to break down. Then, add your castile soap and essential oil and whisk until all ingredients are blended. Funnel into large containers. I used two half gallon mason jars + a recycled gallon-sized apple juice jug. 

sh_blog_laundrysoap_5.jpg

Just add 1/3 cup to a regular load of laundry. After a few days, I noticed a little bit of white filmy build-up in the soap, so just shake well before each use! 

Mint & Frankincense Facewash

After trying just about every face wash throughout my youth, I finally found the best soap for my skin, which has been Dr. Bronner's Peppermint Castile Soap. I've been using it for the past six years and love that it keeps my skin clear. I've always diluted it with half water, just so it isn't as intense. Today, I ran out. With my recent purchase of Young Living's essential oils, a fresh supply of Unscented Dr. Bronner's and a splash of rose water, I've concocted the simplest, dreamiest recipe for a quick replacement. I decided to use a little rosewater to reduce the appearance of puffiness and to soften the skin (also, rosewater smells heavenly!) I also added frankincense to promote smooth skin, and I like peppermint for its refreshing and energizing scent. After my first wash with this recipe, I was actually in shock of how great my face felt! Literally, as smooth as a baby. I didn't even want to put any makeup on, and spent the next couple hours petting my own cheeks. 

sh_blog_facewash_1.jpg

8 oz. Dr. Bronner's Unscented Castile Soap

1 Tb rosewater

Therapeutic grade frankincense and peppermint, 3 drops of each**

A bottle with a small pour spout. I recycled an amber kombucha bottle and a squeeze bottle top from an empty honey bottle! Perfect fit.

Fill your empty bottle with all the ingredients, then fill the rest with purified water (about 8 ounces) and gently shake to mix! You're done. All it takes is a drop to lather.